
In part 1 we defined a PowerShell script for automatically obtaining the IR and the Customer Organisation CI based on the Company property of the Affected User. In part 2 we will plug that script into a workflow.
Creating the Workflow
New MP
First thing you need to do is create a new management pack to contain your workflow. I’m a big fan of separating out Classes, Forms, and Workflows into separate management packs, and group them together. Indeed it is best practice to place your forms into separate management packs from your classes. This approach can make it easier to decommissioned a feature at a later date, as importing an updated MP that has had a class, form, or workflow deleted from it is not supported.
New Workflow
Now Create a new Workflow called something like “UpdateIRwithCustomerOrganisation”
Give it a name and a description:

Set the condition. In this case we need it to run on an ‘as required’ basis.

Finally select the class and criteria. We want our workflow to trigger when an Incident is created.

You should finish up with an empty workflow in your Management Pack.
Next you’ll need to drag out a PowerShell script activity from the Toolbox. For this demo we only need one script activity. Give the script activity a more user friendly name. In this case I’ve used “PowerShellUpdateIRwCustOrg”. You can’t add spaces in the activity name using the Authoring Tool, usually I would edit the XML to do this, but for the purposes of this post I’ve left it as is.

Now we need to configure the parameters and body of the script. To do this click on the radial button next to “Script Body”.
First lets setup a variable for the IR. Give it a name without using the $ character. In this case I’m using IRID. Then select the ID property of the Incident class using the radial button. When you’ve finished it should look like this:

Now onto the PowerShell script itself. This is a simple case of writing or pasting in your script into the Script Body of the PowerShell Activity.
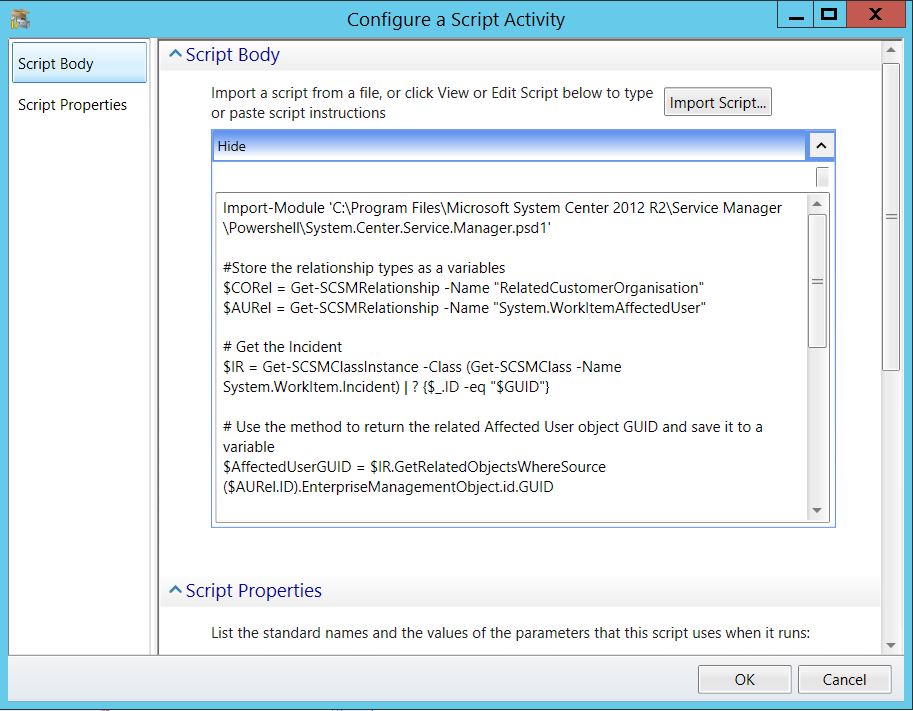
N.B. You can see that the first line of the script in the body is to load the SCSM PowerShell cmdlets. Some of you may be asking why I’m not specifying it in Script Properties of the PowerShell Activity – simply because it’s not supported for this module.
You’re All Set!
Now all you need to do is seal your workflow Management Pack and import it (including the Customer Organisation if you’ve been following along).
When your Incidents are created the Customer Organisation CI relationship will automatically be populated! Happy automating!

One Reply to “Automatically Adding the Customer Company CI When an Incident is Created – Workflow Authoring – Part 2 Authoring the Workflow”
Comments are closed.